Friday, September 4, 2009

I won "Designer of the Month"....................

at the Pazzles company for August!!! My inspiration came from a "Try a New Technique" Challenge at Splitcoast (TLC223) called "Butterfly Box"...you can get all of the details about it here! This was announced back in September, but I'm just now getting around to posting this on my blog, as I had to keep it private until the Pazzles company made their announcement!

Quite sometime back, I had designed a "Butterfly" cutting file for the Pazzles "Inspiration Creative Cutter" and I decided to use the butterfly to make my own butterfly box and use it for my August project. In this project we were supposed to incorporate some Ranger "Claudine Hellmuth Studio Sticky-Back Canvas". I decided to use a background paper and some leaves from a free digital scrapbooking kit named "Misty Morning" by Joni Gray. If any of you would like the kit, it is free and can be downloaded from her blog here! She has quite a few other free kits at her blog and they are all lovely! I then printed the background paper and the leaves on the canvas using my Epson R280 inkjet printer. I cut the "inner" panel on the front and back of the box out of the printed canvas using my Pazzles "Inspiration Creative Cutter" and I also used some of the printed canvas to cover the handle that I had cut out of a cereal box (you can also use chipboard). When I adhered the canvas panels, I noted a bit of unraveling, so I cut a black border (using my Pazzles), covered it with VersaMark and then some glittered embossing powder, set it with my heat gun and adhered it to the canvas panels.....that took care of that problem! I used my original butterfly design to cut some butterflies for embellishments, added some Dew Drops and a black satin bow! For winning "Designer of the Month", I won $100 worth of product for my Pazzles "Inspiration Creative Cutter"...I LOVE shopping!!! Here are some photos:


Thanks for a taking a look!!!
Supplies

Papers: Bazzill, Canson "Effects Papercraft" (Plum Iridescent, Kiwi Iridescent and Papaya Iridescent for the butterflies) and Westrim Crafts black cardstock (for border and butterfly bases)
Inks: Tsukineko "VersaMark Watermark"
Embossing Powder: "Star Dust Transparent" by Stamp-n-Stuff (for glitter trim on handle)
Tools: Pazzles "Inspiration Creative Cutter"
Accessories: Bow Easy, Martha Stewart "Smoky Quartz", "White Gold" and "Florentine Gold" glitter & glue, Deedlebug Black "Crushed Velvet Flock" (bodies of the butterflies), The Robbins Nest "Clear Dew Drops" (I colored them black with a Sharpie) Spare Parts "Black Brads", "Black Satin" ribbon by Offray

Thursday, September 3, 2009

Oh, how I wish that I could take better photos!!!!


Today I participated in the Splitcoast Stampers "Ways to Use It" Challenge (WT234)....you can find all the details here. We were supposed to "Sand It" and I decided to use a piece of cardstock from the Core'dinations "The Whitewash Collection" which is my favorite! I embossed the cardstock and then sanded it with one of my nail buffers!

The "designer" patterned paper was printed on my brand new Epson Stylus Photo 1400 (wide format inkjet) from a digital scrapbook kit that was a free download (some time back) at ScrapArtist. The kit is by Lisa Cohen and is called "Joyful Spirit". It's a very small kit but I happen to LOVE this paper and it printed out so great using my new printer. I printed it on a piece of white cardstock (12"x12") that I've for ages (don't know the brand or the weight), and I did it "border to border" and I was amazed at how it looked..............looks just like a sheet of Basic Grey, etc. paper that I buy at the crafts stores!!! If anyone is looking for an "afordable" wide format printer, you don't want to miss out on this. Office Max is selling these babies for $199.99. My old Epson 1280 cost me $459 but does not work correctly with Vista and well....it's 8 years old and that's old for a printer!

The blue Bazzill cardstock that I used is really pretty but shows up darker in my photo and I was unable to correct it in Photoshop, but trust me it's REALLY pretty IRL!!!!

At any rate, I kept the card pretty simple and made it a "thank you" card, as I can always use them!!! Thanks for stopping by and looking!
Finished Card Size: A2/4.25"x5.5"


Supplies

Papers: Bazzill, Core'dinations "The Whitewash Collection" and "Digital Designer" patterned paper by Lisa Cohen
Ink: Brilliance "Pearlescent ky Blue" (for inking label edges)
Tools: Pazzles "Inspiration Creative Cutter" and Provo Craft "Cuttlebug"
Accessories: Provo Craft Cuttlebug "Elephant Thanks" and "Just My Type Set" embossing folders and "Vintage" die (corners), "Sheerly Yours" Offray Ribbon, Spellbinders Nestabilities "Labels Four", The Paper Studio "Pearls"

Wednesday, September 2, 2009

I used a new technique today!!!


I really needed to make a "thank you" today and I decided to use the "Masked Frame" technique that was Splitcoast Stampers "Technique Lovers Challenge" (TLC236) for this past Monday! My photo looks a bit small, but if you click on it you can get an enlarged view! If you would be interested in it, you can read all about it here! All of the beautiful stamps that I used are some Inkadinkado stamps that I just recently purchased from Crafty Steals...I got like 128 stamps for $17.99!!! I also double stamped the bird to make it look like she had a shadow and I think there's a name for that technique, but I don't know what it is!

One thing that I did a little different for the technique was that I used a PaperMate Eraser Mate pen in the Pen Tool for my Pazzles Inspiration Creative Cutter to "outline" the scalloped circle as well as the inner scallop, covered with gold embossing powder and heat set it. Those pens stay wet for a bit, thus they are great for heat embossing! That was all done at the same time that I was cutting out my front layer of my card. For my mask, I made one using a scalloped circle that I had made using my Pazzles Inspiration Studio software. I cut a scalloped circle and then used the negative also. I then used my markers to color the little flowers and then used gold stickles in the centers. I have to admit that I messed up the first two attempts at this, but hey....I did not give up!!! I feel pretty sure that I will use the technique again, probably many times!
Finished Card Size: A7/5"x7"
Supplies

Papers
: GA Pacific White CS (card base), Neenah White CS and Bazzill

Stamps: "Spring Blossoms Clear Stamp Set" by Indadinkado
Inks: Tsukineko VersaMark "Watermark" and "Tuxedo Black" and Tim Holtz "Broken China" Distress Ink
Tools: Pazzles "Inspiration Creative Cutter", "Bow Easy", Provo Craft "Cuttlebug" and Ranger "Heat It"
Accessories: Fiskars "All A-Fleur" Embossing Border, Martha Stewart "Floral Lace Edge" Border Punch, Ranger "Queen's Gold" Embossing Powder, Offray Ribbon, "Golden Rod" Stickles, Copic & Neopiko markers, PaperMate "EraserMate" Med. Black Pen, 1/16" Perfect Layers, Spellbinders Nestabilities "Long Rectangles Small"

Saturday, August 29, 2009

Jerri made me do it!!!

Seriously, Jerri Jimenez's (A Touch of Grace) card, here inspired me to design this card which I'm also using for yesterday's Splitcoast Stampers Limited Supplies Challenge (LS235) where we had to include at least one butterfly as well as a money card/envelope! For those of you that have not registered at Splitcoast Stampers, you really should.....the challenges are so much fun and they really get your "mojo" going!!!


I used an Anna Griffin stamp for the bottom centerpiece of my card and also used my Pazzles Inspiration Studio software to create a mat for the image which I cut using my Pazzles Inspiration. I also designed the card base, small envelope, and the butterflies using my Pazzles Inspiration Studo software and then cut them with my Pazzles Inspiration! For the centers of my butterflies I used black crushed velvet flock. In the center of the bow I affixed an "Ivory Pearl Seal" from Micheals, but before I did I painted the pearl part of it a pink color using Making Memories acrylic paint. Another little note is that I used gold wire to make the antennae for the butterflies. Here is a photo of the inside, showing the little money envelope that I made.


I embossed the "liner" of the envelope. This was a lot of fun, plus I now have a special birthday card ready to give to someone very special!!!
Finished Card Size: A2/4.25"x5/5"


Supplies

Papers: GA Pacific White CS, Westrim Crafts Black CS, Ampad Pink CS & Paper (for envelope liner) and Vellum (Pink & White)
Stamps: Anna Griffin "Flourishes" (large centerpiece) and Lotus Greeting Stamps by Amy Butler for K & Company (sentiment and stamped image)
Inks: Tsukineko VersaMark "Watermark" and Memento "Tuxedo Black"
Embossing Powder: Ranger "Queen's Gold"
Tools: Pazzles "Inspiration Creative Cutter", Provo Craft Cuttlebug "Bow Easy" and Ranger "Heat It"
Accessories: EK Success "Morocco Lace" Border Punch, "Crystal", "Diamond" and "Golden Rod" Stickles, Making Memories "Rose Petals" acrylic paint, "Black" Doodlebug Crushed Velvet Flock", Michaels "Ivory Pearl Seals", "Petal Pink" Liquid Pearls, Recollections "Pink" Pearl Stickers, "White" Pearl Stickers by the Paper Studio, Krylon "18kt Gold Leaving Pen", Provo Craft Cuttlebug "Textile" embossing folder, Stampendous "Wild Roe Gold" Class A Peel Stickers and Offray "Wired Taffeta" Ribbon

Thursday, August 27, 2009

WOW...this is my 3rd masculine card in a week!!!

But...the important thing about this card is that it is for my husband's birthday, today!!!


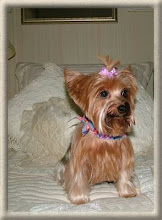
I had been working on creating a card (in my head) for my husband for days and then yesterday when I saw the Sketch Challenge (SC243) at Splitcoast Stampers the ideas started coming! A few weeks ago I had bought three sheets of 12"x12" "specialty" papers at Hobby Lobby and I thought two of them would look great on a masculine card. They are both by the Paper Studio.....the first one is the brown "flocked" paper and it has paw prints on it. My husband is crazy about our little Yorkie ("Miss Dani") so I knew I just had to use that one. The second one is the the gorgeous "gold striped glitter" paper. I also had bought some linen samples from Paper and More and used a couple of them on the front panel. They are 84# card stock and I'm just going to have to break down and order several different packages of them. I'm afraid I was not able to pick up all the beauty of these papers in my photo, but trust me IRL (in real life) they look fantastic!!! All of the silver items on the front panel are Peel-Off stickers that were a gift from my UK Scrappers friend Cal...you can see her blog here. The "velvet looking ribbon tabs" were actually made using some suede paper that I bought years ago from a stamp store in GA that is now closed. I also used my Pazzles Inspiration and a gold pen in the Pen Tool to do the "faux stitching" on the two middle panels. It may not show in my photo, but this card is just a mass of wonderful textures and I think it really has a nice masculine look!!!
Finished Card Size: A2/4.25"x5/5

Supplies

Papers: "Flocked" and "Stripe Glitter - Gold" by the Paper Studio, "Metallic Cream Linen" and "Metallic Gold Linen" Card Stock from Paper and More, "Striped CS" from DCWV All Dressed Up Stack, and "Black CS" by Westrim Crafts
Tools: Pazzles "Inspiration Creative Cutter"
Accessories: "Metal Corner" by Spare Parts, Silver & Gold Beads from Michaels and "Gold" RoseArt Pen

Tuesday, August 25, 2009

I LOVE this little frog image!!!


I'm really pleased with this card that I've made for my brother for his birthday. The frog is a digital image that I created in Photoshop CS3 from a font called "KiddyDing". I used the "w" for the frog and the "q" for the mushroom, printed it out twice and colored the image using my Copic & Neopiko markers. I also have to add that the frog was a "boy" and I turned him into a "girl" by adding the eyelashes and the red lips!!! The "sentiment" was done using my "Basic Black" Stampin Up marker in the Pazzles Inspiration Pen Tool and a Pazzles font called "Engineer"...in other words, my PI did the writing for me.....love that feature!!! The "52" was cut out of "Sequins Silver" vinyl using my Pazzles Inspiration digital cutter too. The cupcake is clipart from Graphics Factory.com. I used a Card Sketch (SC79) from Splitcoast Stampers.
Finished Card Size: A2/5.5"x4.25"

Supplies

Papers: Embassy Black Cardstock (card base), Westrim Crafts (other black CS), Darice Paper Crafter CS (green CS) and GA Pacific White Carstock
Tools: Pazzles "Inspiration Creative Cutter" and Provo Craft "Cuttlebug"
Accessories: Spellbinders Nestabilities "SM Classic Rectangles & SM Classic Scalloped Rectangles", Copic Sketch Markers, Neopiko Markers, The Robins Nest "Dew Drops", Marvy Uchida "White Liquid Applique" (I colored it green using Making Memories "Celery" paint), Stampin Up Black Marker, "Sequins Silver" vinyl and Provo Craft Cuttlebug "Stylized Flowers" & "Tiny Bubbles" embossing folders.

Sunday, August 16, 2009

How about a masculine touch!!!


I made this card today for the Splitcoast Featured Stamper Challenge (FS132) and I'm so pleased that when completed, it really took on a nice masculine look! We have a dear friend whose birthday is on the 25th and I've earmarked this for him! You can find all the details about this challenge here if you would like to play too! Here is the card that inspired me!!! She did not mention the size of this card, so I decided to make mine 4"x9.25".

The main difficulty with this project was getting a good photo of it, which happens quite often! In the previous photo, the middle "square's" stamped image can hardly be seen, so here is a close-up of it!


The stamped sentiment is hard to see in the full photo too, so here is a close-up of it too!

Thanks for looking!!!

Finished Card Size: 4"x9.25"

Supplies

Papers: Westrim Crafts (Black CS), "Silver Swirl on White" by The Paper Company and "Kings Gold" Metallic CS by Wausau Paper
Stamps: "Lotus Greeting Stamps" by Amy Butler for K & Company (sentiment) & Hero Arts "Leaf Prints"
Ink: VersaMark "Watermark" by Tsukineko
Embossing Powders: Ranger "Super Fine Detail Gold, Old Town Crafts "Ultra Fine Silver" and Stamp-n-Stuff "Detail Clear Transparent"
Tools: Pazzles "Inspiration Creative Cutter", Cuttlebug, Ranger "Heat It", Martha Stewart "Arch Lattice" Border Punch
Accessories: Spellbinders Nestabilities"Small Standard Circles" & "Small Scalloped Standard Circles",
Provo Craft Cuttlebug "Vintage" die & "D'vine Swirls" embossing folder, Offray "Black Satin" Ribbon