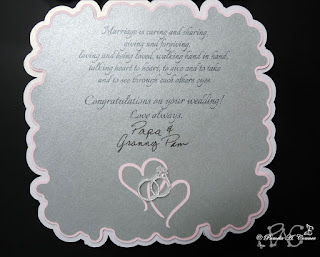
My best friend, Marti's birthday is in less than two weeks and prior to her birthday she is going out of town.....so I made her birthday card early and hand delivered it to her last Friday. I used mostly dies on it and most of them I had never used before. Here are some photos.
I love my "Wildflower Corner Die" by Memory Box [MBC-DIE-98895], but it is way too big for the corners of my card.....so I made a scan, took it into my Silhouette Studio Designer Edition software and modified it just using the larger flowers to make it fit my card. This is what the actual die looks like and it is lovely,
but 3.8 inches which will not work for four corners on a six inch card. If I had just resized it, it would not have cut well with my Cameo, but the modified design cut beautifully on it. I love the finished look that you get with dies and I now buy them often.... the beauty of them is that when you have to you can scan them and resize the design to fit your card design! Here is a close-up of my modification of the die design.
The message on the inside of my card is computer generated. "Happy Birthday" is a Spellbinders die that I have had for a while but never used and the beautiful flourish is my brand new Gina Marie die and I think it is one of the prettiest that I own! Here is a photo.
I used my JustRite die set again for my signature label and the text is once again computer generated. You can see a list of all the fonts I used on this card in the "Supply List" below.
For my envelope I looked through my designer paper "stash" and found one from the Rhonna Farrer "Autumn Leaves" paper pack that really matched the colors in my card. Please excuse the quality of my photo of the front of the envelope....you can tell the color better in my photo of the back of the envelope.
I just want to add thank you for stopping by and Marti loved her card!!!
Finished
Card Size: 6" Square
Supplies List
Papers: Recollections 65# Pale
Blue from the "Dreamy" Collection ", 110# Recollections "Ivory",
Designer Paper from the Paperbilities Rhonna Farrer "Autumn Leaves"
paper pack (for envelope)
Stamps: "Happy Birthday" from "Persian Motifs Stamp
Set" by Altenew, "Sophisticated Script Stamp Set" from Concord
& 9th (marti) on envelope
Inks: Tsukineko "VersaMark Watermark"
Cut Files: "Wildflower Corners", made from a scan of
my "Wildflower Corner Die" [Memory Box MBC-DIE-98895] cut that I
modified in my Silhouette software to utilize just the lovely flowers that I
could fit in the corners of my card panel.
Dies: Spellbinders "6x6 Matting Basics A &
B", "Happy Birthday" from the "Sentiments One" die set
[S2-082] and "Ironwork Accents" [S5-058], Gina Marie stitched oval
from the "Fancy Floral Frame"
and "Flourish", JustRite
"Elegant Garden Label Dies".
Fonts: "Corinthia" (inside message), "Allure Script" (signature label), "Ambarella", "Arabella" (~2016~)
Fonts: "Corinthia" (inside message), "Allure Script" (signature label), "Ambarella", "Arabella" (~2016~)
Tools: Silhouette "Cameo", Brother
"ScanNCut", Martha Stewart "Score Board", Milwaukee
"Heat Gun", WeR Memory Keepers "Envelope Punch Board",
Tim Holtz "Vagabond 2"
Accessories: Tonic Studios "Wedgewood Blue NUVO Crystal
Drops"


