Tuesday, December 22, 2009

.....and she's back!!!!!!!!!!!!!!!!!!!!


I guess everyone thinks that I left the country, but I've really just been so busy with family and preparing for the holidays that I've not had much time for crafting! One thing that my husband and I have been doing is spending lots of time with his siblings. He lost a brother and a sister during the past three years and as I posted here on my blog, we almost lost another sister who was in a horrible auto accident this past March (she lost her husband, our brother-in-law) in that same accident. We now get together (my husband, his oldest brother and two of his three younger sisters) at least once a week....we have dinner together and then play cards and we have a blast. I will always treasure these times!!! Hopefully, once the holiday season is over I will have a lot more time for my crafting!!!

I did make some luminaries to give as little Christmas gifts. I have photos of a couple of them...in all I have made five! If you would like a "recipe" for making them, you can find it here at the Splitcoast Stampers site, as well as a little video tutorial. Everyone I have given them to really like them!!! Thanks for taking time out of your busy schedules to stop by and "Happy Holidays"!!!
Supplies

Paper: Bazzill "French Vanilla" & "Capers" (bases), Bazzill "Blind Date" (blue), digitally designed patterned papers "Joyful Spirit" by Lisa Cohen (floral design) and "Misty Morning" by Joni Gray (ivy leaves), as well as some green wallpaper samples.
Stamps: Walmart, Studio G and In kadinkado
Ink: Tsukineko "VersaMark Watermark"
Embossing Powders: Ranger "Super Fine Detail Gold" & Stamp-n-Stuff "Detail White Opaque"
Tools: Pazzles "Inspiration Creative Cutter", QuicKutz "Revolution", Ranger Inkssentials "Heat-It" Craft Tool
Accessories: Martha Stewart "Arch Lattice" Border Punch, Spellbinders "Labels Four", Michael's "Gold" Rinestone Stickers, The Paper Studio "Pearls"

Saturday, November 14, 2009

Happy Birthday Klo!!!

I designed and created this very special birthday card for my friend and teacher Klo, who has taught me so much about the Pazzles Inspiration software for my Pazzles "Inspiration Creative Cutter". Her birthday is the 13th, so I'm not going to post this to my blog until Saturday, the 14th. Another very good friend and fellow Pazzles Design Team Member, Sue Reynolds, just recently designed a new Pen Tool that can be used with my Inspiration, that can hold many different sized pens and for this card, I used her pen tool with a Quickie Glue Pen to made the "lattice" panel. After I removed the panel from my Pazzles "Inspiration Creative Cutter" I covered the "lattice" lines with silver embossing powder and heat set it with my "Heat It" craft tool. I also used the same technique for make the silver lines around the bottom card panel...I wanted it to have the look of "peel-off" stickers, so I'm going to call it "Faux Peel Offs". In addition I used the very same technique for the "sentiment" and the "46", but I added some crystal stickles to the "46". I topped it all off with a bow made with my Bow Easy....love that little tool!!!


For the inside of the card, I used my "faux peel-offs" technique again around the bottom panel.


Here is a close-up of the top inside panel, where I used the smaller "Fluer de lis" pendant die and then some Nestie circles and topped it off with a real "Peel-Off" sticker of a gift:


And here is a close-up of the lower inside panel showing the way I embossed my text onto a vellum square. I did the text in Photoshop using the beautiful "CAC Lasko Even Weight" font (free), printed it out using my Canan PIXMA 530 inkjet's "Photo Paper" setting and just as quickly as I took it out of the printed, I covered it with clear embossing powder to that it would be embossed. The text was done in black but after covering it with the clear EB powder and heat setting it, it almost looks silver!!! Also, the silver trim around it is actually "peel-off" stickers, as well as the "~2009~"!


This was a lot of fun to design and create and I hope Klo really liked it! Thanks for coming by to check it out!!!
Finished Card Size: A2/4.25"x5.25"
Supplies

Paper: Wausau Creative Collection Metallic Cardstock "Chalice Silver", Canson Effects Papercraft "Galvanized" (fleur de lis panel beneath velum text panel), Staples "White Vellum" and Blue/Grey Carstock (don't know brand...some I've had for years!)
Embossing Powders: Stamp-n-Stuff "Detail Silver" and "Detail Clear Transparent"
Tools: Pazzles "Inspiration Creative Cutter", QuicKutz "Revolution", Ranger Inkssentials "Heat-It" Craft Tool, Sue Reynold's "Pen Tool"
Accessories: Spellbinders Shapeabilities Pendants "Fluer De Lis" and Nestabilities "Circles", Mark Richards "Crystal Stickers Pearls", "Crystal" Stickles, Flower Soft "Peel Off Stickers" (around text block), Mark Richards "Peel-Offs" stickers (gift), Michaels "Bridal Elegance" Ribbon, EK Success "Fleur de lis" border punch, "~2009~" Peel Off Stickers (gift from friend in the UK), Sakura "Quickie Glue Pen"

Fonts: Pazzles "PZ Up Town" and "CAC Lasko Even Weight"

Tuesday, November 3, 2009

Oops....I forgot to post this card last month!!!

My niece's birthday was October 17th and this is the card that I made for her and I purposely did not upload here to my blog after I finished it, because I was afraid she might stop by and see it...anyway, that's why I forgot! So here it is now!!!


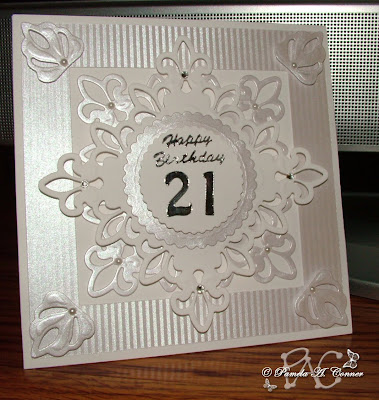
I had just bought the Spellbinders "Fleur De Lis" set a day before I made this card and of course, I could not wait to use it! The design of this card is extremely simple...what makes the card so pretty is the combination of the "Fleur De Lis" set, the gorgeous sparkling papers and the beautiful Swarvoski crystals!!!

Thanks for stopping by to take a peek!
Finished Card Size: 5.5"x5.5"

Supplies

Papers: Neenah White CS and WorldWin "Sparkling Papers" (Jewel Toned Mica Coated Papers)
Tools: Pazzles "Inspiration Creative Cutter", QuicKutz "Revolution"
Accessories: Spellbinders Shapeabilities Pendants "Fleur De Lis" and Nestabilities "Circles", PeelOff Stickers (gift from friend in the UK), Mark Richards "Half Pearls" and Swarvoski "Chrystal Beads"

Monday, November 2, 2009

I LOVE this technique!!!!!

Double Embossing or Blank Embossing was the technique for today's challenge (TLC245) at Splitcoast Stampers......you can check out all of the details here at the site. Lynn sent us to a video by Nilda at "The Cuttlebug Spot" and earlier this morning the video was not working, but it is now. Once I watched Nilda's video this technique was a lot easier and I really had fun with it!!! Click on the photo below for a close-up of it:


There were a lot of "firsts" with this card.............first time I've used this technique, first time I've used this embossing folder, first time I've used these stamps, first time I've used my new Memento "Rich Cocoa" ink pad and the first time I've made my own "ribbon corners"!!! For all of my coloring, I used glitter and metallic pens. I also designed a Pazzles cutting file for the matching, lined envelope and I used the same embossing folder on the envelope too. Thanks for stopping by to take a peek!
Finished Card Size: A2/4.25"x5.5"
Supplies

Paper: GA Pacific
Stamps: Recollections "Timres Transparent Merry Merry"
Inks: Tsukineko Memento "Rich Cocoa"
Tools: Provo Craft "Cuttlebug" and Pazzles "Inspiration Creative Cutter"
Accessories: Stampin'Up! "Textured Impressions Finial Press" embossing folder, Bow Easy, Beifa "Glitter & Metallic Gel Pens", Offray Ribbon, Spellbinders Nestabilities "Labels Four"

Friday, October 9, 2009

Booooo!!!!!


I'm not positive, but this may well be the first time I've made a Halloween card! Today for the "Limited Supply Challenge" (LSC241) we were supposed to do a "FALL-themed" card with stamps, paper and ink.....NO embellishments! It was alright to use diecuts, but the focal point should be something STAMPED. If you would like to join in the fun, you can find all the pertinent information here! For mine I used this adorable "mummy" stamp by Recollections, cut him out and used black fun foam pieces to adhere him with dimension. I also used a stamp for the "sentiment and I colored the pumpkin on it with some Neopiko markers. All of the background was done using die cut files from Pazzles and they were cut with my Pazzles "Inspiration Creative Cutter" and my Craft Robo. For the creepy spider, I used some clear embossing powder and heat set it to give her a shiny, black widow look! Don't you just love that haunted looking house with the orange moon? I'm sure my little grandsons will love this!
Finished Card Size: A2/4.25"x5.5"
Supplies

Paper: Black, orange and blue grey CS (don't know brands...have had for years!)
Stamps: Recollections "Mummy" and "October Calender" by Studio G
Inks: Tsukinedo "Graphite Black" Brilliance and Memento "Tuxedo Black"
Embossing Powders: Old Town Crafts "Black Jewels" (sentiment) and Stamp-n-Stuff "Detail Clear Transparent"
Tools: Pazzles "Inspiration Creative Cutter", Graphtec "Craft robo", Ranger "Heat It" and Provo Craft "Cuttlebug"
Accessories: Spellbinders "Standard Circles & Scalloped Cirles SM", Neopiko Markers

Thursday, October 8, 2009

Playing with my new SU "Petals-a-Plenty"!!!

Last week I placed my very first order of Stampin'Up products and they arrived later yesterday afternoon, so of course I had to play with one of them today! I've seen many cards done using the "Petals-a-Plenty Textured Impressions" embossing folder and I decided to order it. I also used the Splitcoast Stampers Wednesday Sketch Challenge (SC249) as my inspiration. If you want to play along you can find it here. As you can see by my photos, these images were very difficult to capture. They look much better IRL (in real life), particularly the beautiful snowflake.


Here is a close-up of the snowflake:


I cut two blue panels and ran them through my Big Shot using the Stampin'Up "Petals-a-Plenty" embossing folder. On the first blue layer I used the debossed side and brushed over the top of it with my Brilliance "Platinum Planet" and then used a silver glitter pen on the circles in the middle of each flower. I did the very same thing on the top blue panel and the top white panel, but I used the embossed side! The gorgeous snowflake is actually from the letter "E" of the font called "Faux Snowflake BRK" and was cut out using my Craft Robo digital cutter. I used white card stock that was stamped with the "Platiunum Planet" then covered with "Star Dust" embossing powder and heat set with my heat gun...did this twice and then added a flat-backed pearl! The "faux stitching" on the horizontal blue panel was actually done using the silver glitter pen in the Pen Tool on my Pazzles "Inspiration Creative Cutter".

I have to say that I LOVE my new Stampin'Up embossing folders (I also ordered the "Elegant Bouquet" and the "Finial Press")...you will seeing lots of cards made by me using them!!!

Thanks for stopping by to take a peek!!!
Finished Card Size: A2/4.25"x5.5"
Supplies

Papers: Bazzill and GA Pacific White CS
Stamps: Studio G "December Calendar Stamp"
Inks: Tsukineko "Platinum Planet" Brilliance Pigment & VersaMark "Watermark"
Embossing Powder: Old Town Crafts "Ultra Fine Silver" and Stamp-n-Stuff "Star Dust Transparent"
Tools: Pazzles "Inspiration Creative Cutter", Graphtec "Craft Robo", Ranger "Heat It", Sizzix "Big Shot" and Provo Craft "Cuttlebug"
Accessories: Martha Stewart "Floral Lace Edge" Border Punch, Spellbinders Nestabilities "Standard Circles & Scalloped Circles SM", Mark Richards "Pearl Perle", Michael's "Silver Half Pearl Stickers", Beifa "Silver Glitter" Gel Pen, Ribbon (remnant that I had on hand, but looks much like the "Bridal Elegance" from Michaels)

Tuesday, October 6, 2009

Check out the UK "Innies" & "Outies"!!!

Well, I don't know if I have them spelled right, but I've been watching some of the "Create and Craft TV" shows at their website in the UK and the other day one of the guests was demoing cards using the negative and the positive of cut outs. I'm probably wording this all wrong and I can't remember which guest it was, but I decided to play with the idea using my Craft Robo "Print and Cut" feature and I see all kinds of possibilities!!! I found this vintage image by doing a Google search of images that are Public Domain and I thought it would make a pretty Christmas card. These were some that I made just for practice and I did the sentiment using my Pazzles "Inspiration Studio" software and the Pazzles "Alte Swabacher" font. I used a white gel pen in the Pazzles "Pen Tool" and I love the effect I got with it!!! The image was printed on my inkjet printer.

Innie


Outie


What do you think?
Finished Card Sizes: A24.25"x5.5"

Supplies

Paper: GA Pacific "White" Cardstock (card base) and black and white CS
Tools: Pazzles "Inspiration Creative Cutter", Canon Pixma MP530, Craft Robo
Accessories: Sakura "White Gelly Roll" gel pen

Monday, October 5, 2009

"Faux Suede" Technique

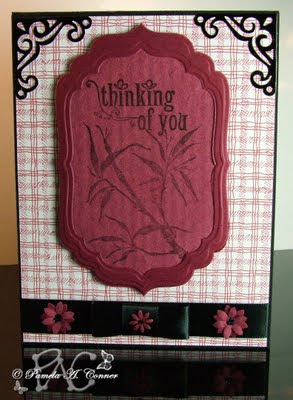
OK, so I've been playing today! I decided to do the "Technique Challenge" (TLC241) at Splitcoast Stampers and this is my first try at this technique. If you would like to play too, you can find it here! First of all, please click on the following image to get a larger view:


The wine/burgundy cardstock the I used for the "faux suede" is some that I've had in my stash for years and I'm sorry, but I don't know who made it. I actually just started out to practice with it, but when I got through preparing it, I decided it was a "keeper", so then I started selecting other papers to go with it. I chose some black cardstock and a piece of "Wild Rose" patterned paper...I thought they all looked great together! I decided to keep my color scheme to the wine/burgundy, black and white. I used the same wine/burgundy cardstock (without making it "faux suede") for the outer labels frame. For the die cut corners, I used a piece of black from the Best Occasions "Metallic Paper Pack" since the shinny look of it matched the black satin ribbon that I used. This was a fun technique and I will certainly be using it again!!!

Thanks for stopping by!!!
Finished Card Size: A2/4.25"x5.5"
Supplies

Papers: Provo Craft Color Wheel Palettes "Wild Rose Bitty Pad" (patterned paper), Best Occasions "Metallic Paper Pack" (black metallic), Wine/Burgundy CS, Recollections (black CS)
Stamps: PSX (F-1741) "Asian Bamboo Shoots" and Inkadinkado "Spring Blossoms Clear Stamp Set (Thinking of You)
Ink: Tsukineko Brilliance "Graphite Black" pigment
Tools: Pazzles "Inspiration Creative Cutter", Provo Craft "Cuttlebug"
Accessories: Spellbinders Nestabilities "Labels Four", Provo Craft Cuttlebug "Vintage" die, Offray "Black Satin" Ribbon, Range "Black Diamonds" Stickles (flower centers), Flower Punches

Wednesday, September 30, 2009

Happy Turkey Day!!!

I have been taking it easy for about the past 10 days, after completing my last project for the Pazzles 2009 Design Team, but today I decided that I wanted to participate in the Splitcoast Stampers Sketch Challenge (SC248). If you would like to participate, you can find it here! I decided to make mine a Thanksgiving Card!


The multi-colored "punched leaves" were punched from a paper that I designed using "alcohol inks" and the copper looking ones were punched from a paper that I designed using a metallic paint. The black decorative elements on the left side were cut using my Pazzles "Inspiration Creative Cutter" and a cutting file from the Pazzles "Swirls & Twirls" CD. The center black "lacqured" panel was designed by me. I stamped the black CS using VersaMark and a couple of leaf stamps and then used my Perfect Pearls. I then VersaMarked the entire panel, covered with clear embossing power and heat set three times. Thanks for looking!!!
Finished Card Size: A2/4.25"x5.5"


Supplies


Papers: Embassy Black Cardstock by Ampad and
"King's Gold" and "White Gold" Metallic Cardstock by Wausau
Stamps: "Leafs" from Spring Blossoms Clear Stamp Set by Inkadinkado, "Butterfly" from Lotus Greeting Stamps by Amy Butler by K&Company and "happy turkey day" by Studio G
Ink: VersaMark "Watermark" by Tsukineko
Embossing Powder: "Detail Clear Transparent" by Stamp-n-Stuff
Tools: Pazzles "Inspiration Creative Cutter", Ranger "Heat It" and Provo Craft "Cuttlebug"
Accessories: The Robins Nest "Dew Drops", Leaf Punches, Provo Craft "Leafy Branch" Embossing Folder & "Vintage Die", Tim Holtz Adirondack "Alcohol Inks" by Ranger, Ranger "Perfect Pearls" and "Lumiere" Metallic Acrylic Paint by Jacquard

Friday, September 4, 2009

I won "Designer of the Month"....................

at the Pazzles company for August!!! My inspiration came from a "Try a New Technique" Challenge at Splitcoast (TLC223) called "Butterfly Box"...you can get all of the details about it here! This was announced back in September, but I'm just now getting around to posting this on my blog, as I had to keep it private until the Pazzles company made their announcement!

Quite sometime back, I had designed a "Butterfly" cutting file for the Pazzles "Inspiration Creative Cutter" and I decided to use the butterfly to make my own butterfly box and use it for my August project. In this project we were supposed to incorporate some Ranger "Claudine Hellmuth Studio Sticky-Back Canvas". I decided to use a background paper and some leaves from a free digital scrapbooking kit named "Misty Morning" by Joni Gray. If any of you would like the kit, it is free and can be downloaded from her blog here! She has quite a few other free kits at her blog and they are all lovely! I then printed the background paper and the leaves on the canvas using my Epson R280 inkjet printer. I cut the "inner" panel on the front and back of the box out of the printed canvas using my Pazzles "Inspiration Creative Cutter" and I also used some of the printed canvas to cover the handle that I had cut out of a cereal box (you can also use chipboard). When I adhered the canvas panels, I noted a bit of unraveling, so I cut a black border (using my Pazzles), covered it with VersaMark and then some glittered embossing powder, set it with my heat gun and adhered it to the canvas panels.....that took care of that problem! I used my original butterfly design to cut some butterflies for embellishments, added some Dew Drops and a black satin bow! For winning "Designer of the Month", I won $100 worth of product for my Pazzles "Inspiration Creative Cutter"...I LOVE shopping!!! Here are some photos:


Thanks for a taking a look!!!
Supplies

Papers: Bazzill, Canson "Effects Papercraft" (Plum Iridescent, Kiwi Iridescent and Papaya Iridescent for the butterflies) and Westrim Crafts black cardstock (for border and butterfly bases)
Inks: Tsukineko "VersaMark Watermark"
Embossing Powder: "Star Dust Transparent" by Stamp-n-Stuff (for glitter trim on handle)
Tools: Pazzles "Inspiration Creative Cutter"
Accessories: Bow Easy, Martha Stewart "Smoky Quartz", "White Gold" and "Florentine Gold" glitter & glue, Deedlebug Black "Crushed Velvet Flock" (bodies of the butterflies), The Robbins Nest "Clear Dew Drops" (I colored them black with a Sharpie) Spare Parts "Black Brads", "Black Satin" ribbon by Offray

Thursday, September 3, 2009

Oh, how I wish that I could take better photos!!!!


Today I participated in the Splitcoast Stampers "Ways to Use It" Challenge (WT234)....you can find all the details here. We were supposed to "Sand It" and I decided to use a piece of cardstock from the Core'dinations "The Whitewash Collection" which is my favorite! I embossed the cardstock and then sanded it with one of my nail buffers!

The "designer" patterned paper was printed on my brand new Epson Stylus Photo 1400 (wide format inkjet) from a digital scrapbook kit that was a free download (some time back) at ScrapArtist. The kit is by Lisa Cohen and is called "Joyful Spirit". It's a very small kit but I happen to LOVE this paper and it printed out so great using my new printer. I printed it on a piece of white cardstock (12"x12") that I've for ages (don't know the brand or the weight), and I did it "border to border" and I was amazed at how it looked..............looks just like a sheet of Basic Grey, etc. paper that I buy at the crafts stores!!! If anyone is looking for an "afordable" wide format printer, you don't want to miss out on this. Office Max is selling these babies for $199.99. My old Epson 1280 cost me $459 but does not work correctly with Vista and well....it's 8 years old and that's old for a printer!

The blue Bazzill cardstock that I used is really pretty but shows up darker in my photo and I was unable to correct it in Photoshop, but trust me it's REALLY pretty IRL!!!!

At any rate, I kept the card pretty simple and made it a "thank you" card, as I can always use them!!! Thanks for stopping by and looking!
Finished Card Size: A2/4.25"x5.5"


Supplies

Papers: Bazzill, Core'dinations "The Whitewash Collection" and "Digital Designer" patterned paper by Lisa Cohen
Ink: Brilliance "Pearlescent ky Blue" (for inking label edges)
Tools: Pazzles "Inspiration Creative Cutter" and Provo Craft "Cuttlebug"
Accessories: Provo Craft Cuttlebug "Elephant Thanks" and "Just My Type Set" embossing folders and "Vintage" die (corners), "Sheerly Yours" Offray Ribbon, Spellbinders Nestabilities "Labels Four", The Paper Studio "Pearls"

Wednesday, September 2, 2009

I used a new technique today!!!


I really needed to make a "thank you" today and I decided to use the "Masked Frame" technique that was Splitcoast Stampers "Technique Lovers Challenge" (TLC236) for this past Monday! My photo looks a bit small, but if you click on it you can get an enlarged view! If you would be interested in it, you can read all about it here! All of the beautiful stamps that I used are some Inkadinkado stamps that I just recently purchased from Crafty Steals...I got like 128 stamps for $17.99!!! I also double stamped the bird to make it look like she had a shadow and I think there's a name for that technique, but I don't know what it is!

One thing that I did a little different for the technique was that I used a PaperMate Eraser Mate pen in the Pen Tool for my Pazzles Inspiration Creative Cutter to "outline" the scalloped circle as well as the inner scallop, covered with gold embossing powder and heat set it. Those pens stay wet for a bit, thus they are great for heat embossing! That was all done at the same time that I was cutting out my front layer of my card. For my mask, I made one using a scalloped circle that I had made using my Pazzles Inspiration Studio software. I cut a scalloped circle and then used the negative also. I then used my markers to color the little flowers and then used gold stickles in the centers. I have to admit that I messed up the first two attempts at this, but hey....I did not give up!!! I feel pretty sure that I will use the technique again, probably many times!
Finished Card Size: A7/5"x7"
Supplies

Papers
: GA Pacific White CS (card base), Neenah White CS and Bazzill

Stamps: "Spring Blossoms Clear Stamp Set" by Indadinkado
Inks: Tsukineko VersaMark "Watermark" and "Tuxedo Black" and Tim Holtz "Broken China" Distress Ink
Tools: Pazzles "Inspiration Creative Cutter", "Bow Easy", Provo Craft "Cuttlebug" and Ranger "Heat It"
Accessories: Fiskars "All A-Fleur" Embossing Border, Martha Stewart "Floral Lace Edge" Border Punch, Ranger "Queen's Gold" Embossing Powder, Offray Ribbon, "Golden Rod" Stickles, Copic & Neopiko markers, PaperMate "EraserMate" Med. Black Pen, 1/16" Perfect Layers, Spellbinders Nestabilities "Long Rectangles Small"

Saturday, August 29, 2009

Jerri made me do it!!!

Seriously, Jerri Jimenez's (A Touch of Grace) card, here inspired me to design this card which I'm also using for yesterday's Splitcoast Stampers Limited Supplies Challenge (LS235) where we had to include at least one butterfly as well as a money card/envelope! For those of you that have not registered at Splitcoast Stampers, you really should.....the challenges are so much fun and they really get your "mojo" going!!!


I used an Anna Griffin stamp for the bottom centerpiece of my card and also used my Pazzles Inspiration Studio software to create a mat for the image which I cut using my Pazzles Inspiration. I also designed the card base, small envelope, and the butterflies using my Pazzles Inspiration Studo software and then cut them with my Pazzles Inspiration! For the centers of my butterflies I used black crushed velvet flock. In the center of the bow I affixed an "Ivory Pearl Seal" from Micheals, but before I did I painted the pearl part of it a pink color using Making Memories acrylic paint. Another little note is that I used gold wire to make the antennae for the butterflies. Here is a photo of the inside, showing the little money envelope that I made.


I embossed the "liner" of the envelope. This was a lot of fun, plus I now have a special birthday card ready to give to someone very special!!!
Finished Card Size: A2/4.25"x5/5"


Supplies

Papers: GA Pacific White CS, Westrim Crafts Black CS, Ampad Pink CS & Paper (for envelope liner) and Vellum (Pink & White)
Stamps: Anna Griffin "Flourishes" (large centerpiece) and Lotus Greeting Stamps by Amy Butler for K & Company (sentiment and stamped image)
Inks: Tsukineko VersaMark "Watermark" and Memento "Tuxedo Black"
Embossing Powder: Ranger "Queen's Gold"
Tools: Pazzles "Inspiration Creative Cutter", Provo Craft Cuttlebug "Bow Easy" and Ranger "Heat It"
Accessories: EK Success "Morocco Lace" Border Punch, "Crystal", "Diamond" and "Golden Rod" Stickles, Making Memories "Rose Petals" acrylic paint, "Black" Doodlebug Crushed Velvet Flock", Michaels "Ivory Pearl Seals", "Petal Pink" Liquid Pearls, Recollections "Pink" Pearl Stickers, "White" Pearl Stickers by the Paper Studio, Krylon "18kt Gold Leaving Pen", Provo Craft Cuttlebug "Textile" embossing folder, Stampendous "Wild Roe Gold" Class A Peel Stickers and Offray "Wired Taffeta" Ribbon

Thursday, August 27, 2009

WOW...this is my 3rd masculine card in a week!!!

But...the important thing about this card is that it is for my husband's birthday, today!!!


I had been working on creating a card (in my head) for my husband for days and then yesterday when I saw the Sketch Challenge (SC243) at Splitcoast Stampers the ideas started coming! A few weeks ago I had bought three sheets of 12"x12" "specialty" papers at Hobby Lobby and I thought two of them would look great on a masculine card. They are both by the Paper Studio.....the first one is the brown "flocked" paper and it has paw prints on it. My husband is crazy about our little Yorkie ("Miss Dani") so I knew I just had to use that one. The second one is the the gorgeous "gold striped glitter" paper. I also had bought some linen samples from Paper and More and used a couple of them on the front panel. They are 84# card stock and I'm just going to have to break down and order several different packages of them. I'm afraid I was not able to pick up all the beauty of these papers in my photo, but trust me IRL (in real life) they look fantastic!!! All of the silver items on the front panel are Peel-Off stickers that were a gift from my UK Scrappers friend Cal...you can see her blog here. The "velvet looking ribbon tabs" were actually made using some suede paper that I bought years ago from a stamp store in GA that is now closed. I also used my Pazzles Inspiration and a gold pen in the Pen Tool to do the "faux stitching" on the two middle panels. It may not show in my photo, but this card is just a mass of wonderful textures and I think it really has a nice masculine look!!!
Finished Card Size: A2/4.25"x5/5

Supplies

Papers: "Flocked" and "Stripe Glitter - Gold" by the Paper Studio, "Metallic Cream Linen" and "Metallic Gold Linen" Card Stock from Paper and More, "Striped CS" from DCWV All Dressed Up Stack, and "Black CS" by Westrim Crafts
Tools: Pazzles "Inspiration Creative Cutter"
Accessories: "Metal Corner" by Spare Parts, Silver & Gold Beads from Michaels and "Gold" RoseArt Pen

Tuesday, August 25, 2009

I LOVE this little frog image!!!


I'm really pleased with this card that I've made for my brother for his birthday. The frog is a digital image that I created in Photoshop CS3 from a font called "KiddyDing". I used the "w" for the frog and the "q" for the mushroom, printed it out twice and colored the image using my Copic & Neopiko markers. I also have to add that the frog was a "boy" and I turned him into a "girl" by adding the eyelashes and the red lips!!! The "sentiment" was done using my "Basic Black" Stampin Up marker in the Pazzles Inspiration Pen Tool and a Pazzles font called "Engineer"...in other words, my PI did the writing for me.....love that feature!!! The "52" was cut out of "Sequins Silver" vinyl using my Pazzles Inspiration digital cutter too. The cupcake is clipart from Graphics Factory.com. I used a Card Sketch (SC79) from Splitcoast Stampers.
Finished Card Size: A2/5.5"x4.25"

Supplies

Papers: Embassy Black Cardstock (card base), Westrim Crafts (other black CS), Darice Paper Crafter CS (green CS) and GA Pacific White Carstock
Tools: Pazzles "Inspiration Creative Cutter" and Provo Craft "Cuttlebug"
Accessories: Spellbinders Nestabilities "SM Classic Rectangles & SM Classic Scalloped Rectangles", Copic Sketch Markers, Neopiko Markers, The Robins Nest "Dew Drops", Marvy Uchida "White Liquid Applique" (I colored it green using Making Memories "Celery" paint), Stampin Up Black Marker, "Sequins Silver" vinyl and Provo Craft Cuttlebug "Stylized Flowers" & "Tiny Bubbles" embossing folders.

Sunday, August 16, 2009

How about a masculine touch!!!


I made this card today for the Splitcoast Featured Stamper Challenge (FS132) and I'm so pleased that when completed, it really took on a nice masculine look! We have a dear friend whose birthday is on the 25th and I've earmarked this for him! You can find all the details about this challenge here if you would like to play too! Here is the card that inspired me!!! She did not mention the size of this card, so I decided to make mine 4"x9.25".

The main difficulty with this project was getting a good photo of it, which happens quite often! In the previous photo, the middle "square's" stamped image can hardly be seen, so here is a close-up of it!


The stamped sentiment is hard to see in the full photo too, so here is a close-up of it too!

Thanks for looking!!!

Finished Card Size: 4"x9.25"

Supplies

Papers: Westrim Crafts (Black CS), "Silver Swirl on White" by The Paper Company and "Kings Gold" Metallic CS by Wausau Paper
Stamps: "Lotus Greeting Stamps" by Amy Butler for K & Company (sentiment) & Hero Arts "Leaf Prints"
Ink: VersaMark "Watermark" by Tsukineko
Embossing Powders: Ranger "Super Fine Detail Gold, Old Town Crafts "Ultra Fine Silver" and Stamp-n-Stuff "Detail Clear Transparent"
Tools: Pazzles "Inspiration Creative Cutter", Cuttlebug, Ranger "Heat It", Martha Stewart "Arch Lattice" Border Punch
Accessories: Spellbinders Nestabilities"Small Standard Circles" & "Small Scalloped Standard Circles",
Provo Craft Cuttlebug "Vintage" die & "D'vine Swirls" embossing folder, Offray "Black Satin" Ribbon


Thursday, August 13, 2009

Mother's Day........already?????


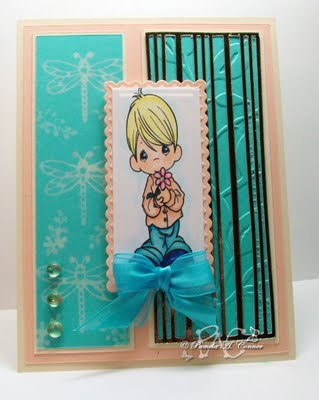
I've actually made this card for my seven year old grandson to give to his Mom for Mother's Day 2010. That adorable little "Precious Moments" boy reminds me of him!!! I will just store this card for him until May. I'm using this card for Splitcoast Stampers Color Challenge (CC231 & you can find it here) "Don't Fade Away", where you use bleach to do your stamping and use whatever color the cardstock bleaches out to as your second color (in this case a cream color). I'm also using it for the Sketch Challenge 241 and you can find it here.

I actually used a dingbat font called "Precious Moments Love 1" (letter "L") to make a digital stamp that I then colored with a combination of my Neopiko & Copic markers. I used some Stickles in the center of the flower. I designed the striped overlay using my Pazzles "Inspiration Studio" software and then cut it on gold metallic cardstock. I have not completed to inside of the card yet, as I want my grandson's input before doing so!

PS. I just changed out the photo of this card because today (8-14-2009), I found some ribbon that kind of matches the card that I like better, so I removed the old bow and added a new one!!!

Finished Card Size: A2/4.25"x5.5"


Supplies

Papers: Best Occasions "Metallic Paper Pack" (gold metallic CS), Gina K "Pure Luxury" (digitally stamped image) and GA Pacific (card base)
Stamps: StampCraft (bleached images)
Tools:
Pazzles "Inspiration Creative Cutter" and Provo Craft "Cuttlebug"
Accessories: Provo Craft Cuttlebug "Leafy Branch" embossing folder, Spellbinders Nestabilities "Long Rectangles Large" and "Long Rectangles Scalloped Large", The Robins Nest "Dew Drops" and Offray Ribbon (tied using the "Bow Easy")

Tuesday, August 11, 2009

Let's utilize our "nail art"!!!!!!!!!!!!

This past weekend I started working on this birthday card for a dear friend who's birthday is this month and I decided that I would use the "Precious Moments" font to do her name (Marti). I did this in Photoshop and actually decided to go ahead and color it with Photoshop as well! I actually had colored the "letters" with a lavender color but after I printed it out I did not like it and decided to go over it with a glitter pen. I discovered that I did not have a glitter pen that was the right color so I wound up using my red Beifa glitter pen....mixed with the lavender it became a really pretty reddish purple color that went well with the Wausau cardstock!!! I also used one of my Neopiko markers to color the cheeks and the Bunny's ear. Well now, here comes the "nail art"!!! While using the glitter pen I made a couple of "boo boos" and instead of starting all over I decided to use some stickers to cover my mistakes (they were really small, but to me showed up big time!) and I really did not have any that were small enough and while going through my drawer I came across some "nail art stickers" that I had purchased some time ago from Walmart and they were tiny and they worked out perfectly. I then decided that I liked them so well that I would use some on each letter and then used some at the top left of the card to "balance it out". Needless to say, I will be going by Walmart this week to see if I can find some more "nail art stickers" to stock up on!!!!


I also want to add that the tiny strips of cardstock that I used as embellishments were cut using my Pazzles "Inspiration Creative Cutter". I love how they cut so evenly using it,, as I could never attempt to get them that even with my paper trimmer!!! The "Happy Birthday" was done using Photoshop and the "CAC Lasko Condensed" font and printed on my inkjet. Another thing that I want to mention is that in my photo the dark cardstock almost looks black but it's actually almost a purple/burgundy color called "Sparkling Merlot" and it has a beautiful golden sheen to it that I was unable to capture with my camera.
Finished Card Size: A2/4.25”x5.5"


Supplies

Papers: Neenah White CS, GA Pacific White CS (card base) and "Sparkling Merlot" Metallic Cardstock by Wausau Paper
Tools: Pazzles "Inspiration Creative Cutter", Martha Stewart "Arch Lattice" Border Punch and the EK Success "Morocco Lace" Border Punch
Accessories: Nailene "Bedazzle Rhinestone Nail Art", Neopilo marker (Y504) and blender, Marvy Uchida "White Liquid Applique" (on Bunny's tail) and Beifa "Red Glitter" pen

Sunday, August 9, 2009

WOW, this has been the most enjoyable crafting weekend........................

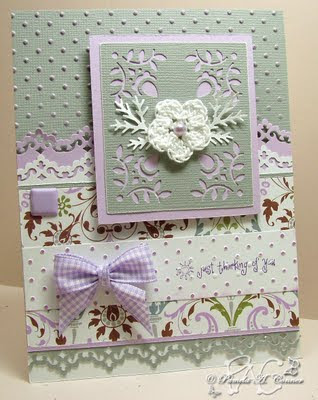
that I've had in months. I've only completed two cards, but I've got another project in the works too! I do think that maybe my "mojo" is coming home!!!! A little earlier today, I was checking out the Splitcoast Stampers "Gallery" and I came across a "hinged" card made by Wendy (aka/Wendybell @ SCS) and she has a fantastic video on how to make it...if you are interested in checking out her video, you can find it here! Well, here is my version of it and I had a blast working on it!!!


Here is a view of it opened up....I've not yet added the wording on the inside, as I will do that when I decide who I going to send it to!


The beautiful crocheted flower was made by my friend Teri's (tlfrank at SCS) mom. Teri was kind enough to send me some and I really treasure them....this is the first time I've used one of them. You know....I think I might be a "hoarder"!!! Here is a close-up of it.


Some time back I bought a "Bow Easy" from Sharon at "No Time to Stamp" blogspot. At here site she has a tutorial on how to use it and if you would like to purchase one and see her tutorial, you can see it here. I made my gingham bow using my "Bow Easy" and here is a close-up of it.


This was fun and thanks for stopping by!!!
Finished Card Size: A2/4.25"x5.5"

Supplies

Papers: GA Pacific (white CS base), Core'dinations ColorCore Cardstock (gray textured CS), Wausau Paper "Smooth Finish" (lavender CS) and Me & My Big Ideas Specialty Cardstock "Parisian Flourish" designer paper (PADX-18)
Stamps: Studio G (sentiment)
Inks: Tsukineko Brilliance "Pearlescent Purple" & "Victorian Violet"
Tools: Pazzles "Inspiration Creative Cutter" and Provo Craft "Cuttlebug"
Accessories: Provo Craft "Swiss Dots" embossing folder, Recollections "Pearl Stickers", EK Success "Victorian Lace" Paper Shaperss Corner Adorner, Martha Stewart "Branch" punch, Fiskars "Lace" Border Punch, Spare Parts "Brad", "Bow Easy" and Michael's Basic Basic "Gingham Ribbon"